Supply Boxes

I have desks!


I like them because all their own belongings can stay in them.

I don't like them because all their supplies stay in them!!

I can't find a pencil!
I can't find my scissors!

So I am making supply baskets.  I used them when I had tables but never desks so we'll see how it goes!

Has anyone else tried it with desks?
How did it go?
Where did you store them?

I got these cute square baskets from The Dollar Tree.

 The green one fits perfectly.  There were other great bright colors.

The cups I already had.  I'm hot gluing them to the bottom so they don't move all around.  I thought these could be used for pencils and scissors.  The small green container will be used for crayons and in between the glue sticks.  It's worth a try.  It only cost $5 total!  Even though ribbon would make it look a little cuter I'm trying to keep the cost of my classroom down.

Here are the labels I'm attaching to the front.
Click on them to get them for free!


0

Little Critter!

I love that Kohl's does the Kohl's Cares!  This program raises money to support kids' health and education. One of our teachers received a $500 grant for their field trip!  It's worth checking out.  

To support them you can buy these cute stuffed animals to go along with your curriculum.  My kiddos love when I get new reading buddy!

I just picked up Little Critter and the book Jack and the Beanstalk.  It's a lift-the-flap book too!
They had a lot of other books and the little sister too Plus they are only $5 each so stop in today to pick yours up!

I can't wait to add him to my Little Critter unit.  Here's a link to a previous post. Click here and pick up a freebie too!


 We just finished our VBS this week, SonTreasure Island!  My boys had a lot of fun!


0

Spelling Pretests

I was meaning to post about my spelling program when a follower asked for more information so that got me rolling the ball.

On the Friday before the unit starts I give the class a pretest on the six words that have the spelling pattern. Currently, we use the Treasure Reading Series 2007.  If the child gets 100% I circle the challenge list for them to practice.  If they got some wrong I circle the regular list.  If they are a child who normally gets challenge every week and they missed one word I will give them the challenge list and the word that they missed!


I have all the lists I have compiled on my parent website that you can also grab.  Click here!

This is the spelling pretest paper that I use on Friday.  The first pretest you give for the year will not have the spelling test portion filled out.  

The Assigned Words portion is where the student takes the actual test for the week.  After they take the test I give the pre-test and sentence dictation.  I grade it all by marking each section.  I mark if they are regular or challenge.  I try to send this home on Friday because they are anxious to know how they did on the test.  You can attach the next units words at the same time or you can choose to send both home on Monday.
Letting the parents see the pre-test is wonderful because the parents can see what words they missed and what mistake they made.

(First sheet) Week 1 Pretest of unit 1 on the first available day before teaching the spelling pattern. 
The Assigned Words and dictation will be blank.
Grade and send home with take home sheet.

(New Sheet) Week 1 Friday - Take Assigned Words Test for Unit 1 whether they are challenge or regular.
Take Pretest for unit 2 and a sentence dictation.
Grade and send home on Friday or Monday with unit 2 take home sheet.

(New Sheet) Week 2 - Take Assigned words test for Unit 2.
Pretest Unit 3 and etc....

I hope this makes sense!

I use a parent volunteer to give the challenge spelling test.  Usually there are only a handful and she gives the test to them in the hallway.

On Friday I also give them a dictation sentence.  This gives me an opportunity to assess them on the use of capitals, periods, spacing and spelling in usage.  


Stop by Classroom Freebies too for more freebies from awesome teachers and bloggers!
Classroom freebies
Classroom Freebies Manic Monday
Or you can share your own freebie on Mondays.


0

Bake Me in a Cake!

The kiddos enjoy watching the Magic School Bus videos.  It's the quietest time of day in this class of 25 and almost all boys!

Today we watched MSB Get Ready, Set, Dough!  They discuss chemical reactions which we had spent a lot of time doing this summer so of course we had to do it again but another way!


I filled 3 water bottles with vinegar.  Each one gradually had a bit more.  I had 3 balloons and filled them with baking soda.  Gradually each one had more baking soda in it.

Now the fun begins!

 We discussed why the balloons got bigger!  Some thought the vinegar went into the balloons.
After sitting for awhile they still had quite a bit of gas!

I asked them what other kind of bubbles they know about.  After some prodding they came up with soap bubbles, blowing bubbles, bubbles when you boil water. but no one came up with bubble gum.  They were a bit surprised when I pulled out packages of Hubba Bubba!


Some were great at blowing bubbles and some learned today!  One of my students couldn't chew gum because of braces so she helped me measure bubbles.  My largest was 3.5 inches.  I was beat out by both of my aides!  What fun this was!  I think next time I would choose a smaller type of gum.  This piece was a bit big for some of the kids.

Get some gum and be a kid again!  It was a blast!!!!


0

Energy!

We started the lesson with watching Magic School Bus Getting Energized.  It shows a lot of ways to make energy such as solar, wind, and water.


Afterwards, we experimented with dominoes.  They had a lot of fun trying to use gravity with potential and kinetic energy to make a domino train!  They just wish they wouldn't fall until they were ready!!!  Here's a short video of my students and some of their domino trains!


They came up with a great idea after the trains kept accidentally falling down.  They used a large domino to separate parts of the train.  That way if it started falling down it would stop at the big block and not ruin the whole thing.  What great thinking minds!

The next day I read a book about our fossil fuels and how we can reduce the amount that we use.  This lead into the conversation of recycling.  So... we made a recycled project (Kazoos).  You use a paper towel tube, wax paper and a rubber band.  We also colored ours with markers.


Zoe shared with us that it was her "Gotcha Day"!  What a happy moment.  She has been adopted I believe for 2 years now!  Her family waited a long time for her and they couldn't be a happier family!  
God's Blessings to you, Zoe!

Now if you like a quiet classroom this project isn't for you!  Wow can 25 kazoos make a lot of noise!


Time to take those home to your parents!! Hee Hee! :)

Feel free to Pin!


0

Big Bubbles!


Bubbles Bubbles Bubbles!

I had three stations set up outside for our bubble experience.  

1) Colored Bubbles for Bubble Art
Using the back of the box of food coloring I added drops to a small cup of bubbles.  This gave me cool colors like turquoise and watermelon.  The students blue bubbles onto a large sheet of white paper.  Very cool looking!

2)  Bubble solution with lots of different bubble wands.  My co-worker found a huge bucket of wands at Target!  Lots of fun!  They loved the big wand I got from Dollar Tree!

3) The favorite center was making a giant bubble.  I purchased my bubble maker from Klutz when those book companies come to your school.  You can buy just the bubble wand on Amazon.  The recipe inside the book is excellent.  I have it at school so I can't post it.  Sorry!
Klutz How to Make Monstrous, Huge, Unbelievably Big Bubbles Handbook toy gift idea birthday


Update:  Here's the recipe!
In a clean bucket in this order:
12 cups water
1 cup dish soap
1 cup cornstarch
2 tablespoons baking powder (not soda)

Stir and then you will have to stir it occasionally.  Skim off the foam.
When the mix is half gone add another cup or so of water!
0

Volcanoes and I'm a Scientist Booklet Freebie!

Teaching Science Sleuths for summer school has been so much fun!  The kids requested that we learn about volcanoes.

We started by watching the Magic School Bus Blows it's Top!  We have it on tape but I just found it online too!  Sometimes these disappear because they shouldn't be online so be careful if you're depending on it.


I read a few books about volcanoes specifically looking at the inside of a volcano.  Just check with your librarian to see what she already has!  No need to buy any new books!
 Then they drew a volcano and labeled the parts.


I had each child make their own volcano.
Materials Needed:
Water bottle with cap and label removed.
Play dough, clay or Salt Water Dough
Strong Paper Plate
Acrylic Paint and brushes
Vinegar
Red Food Coloring
Dish detergent
Baking Soda

We first made the salt water dough together in class.  It was a great way to work on measurement. Plus they loved making the dough!  We used a little bit of the dough on the bottom of our bottle and stuck it to the sturdy paper plate.  We put the dough around the bottles.  We let them set over night.  Since I'm doing this in summer school I am restricted on time.  If I did this during the year I would do this part on Friday and let them dry over the weekend.  Then the dough wouldn't be wet.  We then painted them but I just absent-mindlessly grabbed the tempera rather than the acrylic!  That was a messy mistake!!  When the volcanoes erupted it wet the dough and started to run!  


Click Here to get a printable copy.  Send this home with the child so they can do it again at home.

When they are putting it in it reacts very quick;y and students get scared and yank out the filter too soon.  All the vinegar needs to get inside.


This the Scientist Packet that I have used throughout summer school.  Students used a 12x18 piece of construction paper as a folder and glued the cover on the top.  They were able to store their sheets inside.  It worked well because we had to return to some sheets after days of observation.  Click on older posts to see what we were doing!

Click Here to get it for free.  Please Pin!
0

Oil and Water Do Not Mix!

We've been discussing how some items can mix together like water and food coloring!  Today we are discussing how some things do not mix together!

In a shallow pan put just enough water to fill up the bottom of the pan.  
Put in drops of food coloring  Move the water just a bit to see how the colors combine together to make different colors.

Then add a 1/2 tablespoon of vegetable oil to the pan.  Students will observe the colors moving around and the water and oil with separate and even cause areas of the pan to not have any water of the bottom.

Using a cardstock paper, place it on top of the liquids.  The students loved the effects.  


0

Color Science

The kids showed a look of awe in their faces today! 

I showed them this and asked what marker did I use to make it?

They listed all the colors they see.  (Blue, Yellow, Purple)
 When I told them I only used one marker they said that couldn't be true!
Then I showed them a black marker!
What?!?  Are you kidding?
Use a watercolor marker to make a large dot in the middle of a coffee filter.  We used Mr. Sketch smelly markers.


Fold the filter 3 times.
Put the tip into a cup of warm water and watch the colors bleed out of the black.  The kids were absolutely amazed!


We had spent time discussing primary colors and how when blended together they make different colors.  During our plant activities, a few days earlier we had blended food coloring together to demonstrate this and then added celery stems to the glasses and let the colors rise into the leaves.    So this is was a great correlation.   I also put up a color poster to demonstrate these mixtures.
.
On another coffee filter we colored the three primary colors in big circles.  I told them it looked like a face


Again fold the filter equally 3 times.  Place the tip into a cup of warm water.


The students could see how the colors blended together.  They all looked a bit different.
The next day after they dried we made them into butterflies.


Please Pin and Follow Me!  I use Bloglovin' to follow all my favorite blogs!


0

Statue of Liberty 3D Art Project

I decided to take a stab at using modeling clay with the class.  They said they would rather draw.  Oh well - teacher wins!  I used the Crayola Modeling Magic.  It takes 72 hours to harden completely.

We looked at various photos of Lady Liberty and discussed why it is the color green.  This site has a lot of quick facts to share: http://www.sciencekids.co.nz/sciencefacts/engineering/statueofliberty.html 


For the base we used a piece of cardboard and a small cardboard box.  We used toothpicks to provide support for the arms and head.

For the paint we mixed together green and white and a little blue.

I feel this was a challenge for them that they need extra practice in!  We'll have to do it again sometime or I'll suggest it to the "real" art teacher!!!
0

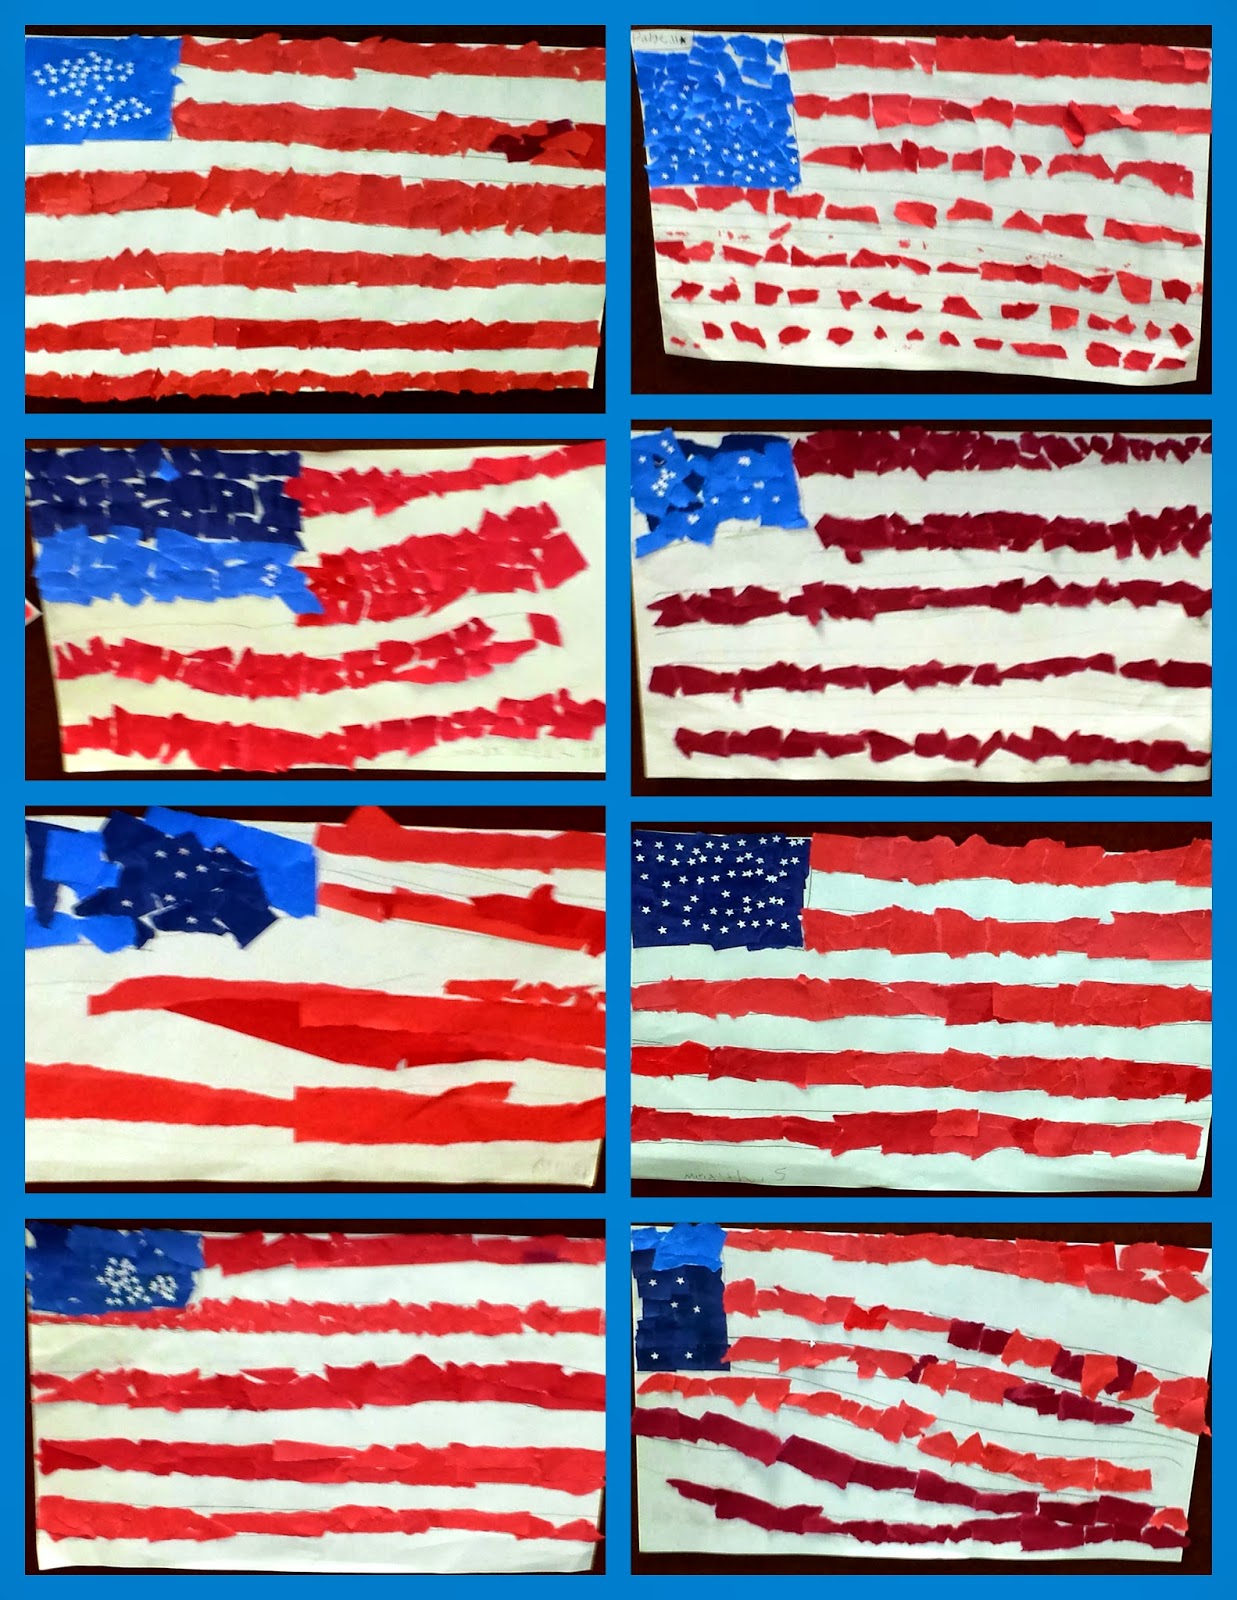
American Flag Art

Students used torn paper to make these.  I offered them various shades and they chose.  This idea came from Deep Space Sparkle by Patty.
The students made these adorable American Flags for the 4th of July!
They decorated the office!  So adorable!


0
Related Posts Plugin for WordPress, Blogger...